Wokwi is a circuit simulator, free to use in the browser (wokwi.com), that can simulate the Raspberry Pi Pico running MicroPython: you wire a circuit, write the main.py, and watch it run with no physical hardware. It is the ideal on-ramp before a board arrives, and a risk-free sandbox for checking wiring before putting a real component in danger. (Unlike Tinkercad, which is Arduino-centred, Wokwi covers the Pico and MicroPython: it is the right tool for this module.)
What is it for?
Wokwi solves three problems that come up constantly in student projects:
- Starting without hardware — while the board is still on order, you can write and test your MicroPython code anyway;
- Testing risky wiring before assembling it — a badly connected motor, H-bridge or supply can destroy a component, where a simulation costs nothing;
- Sharing easily — a Wokwi project is shared as a URL, which is handy for showing a circuit to a supervisor or asking for help remotely.
The tool has limits: not every component is simulated, timing is not realistic down to the microsecond, and some modules are missing. Wokwi does not replace the real circuit: it speeds up the design loop and makes the first power-up safer.
Step by step
Four steps: create a Pico/MicroPython project, place the components, write the code, simulate.
1. Create a Pico project in MicroPython
On wokwi.com, create a free account, then a new project, choosing Raspberry Pi Pico and the MicroPython language. The editor opens with an empty main.py and a Pico already placed on the canvas.
Take a screenshot of the Wokwi project creation page, with “Raspberry Pi Pico” and the “MicroPython” language selected.
2. Place and wire the components
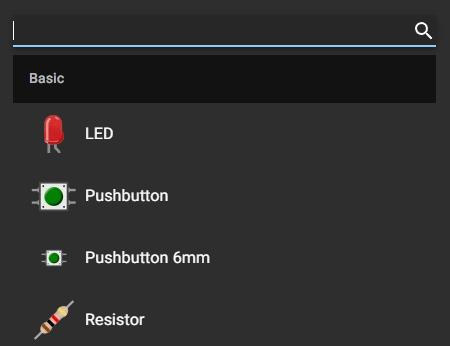
The + button adds components (LED, pushbutton, resistor, sensors, SSD1306 screen and more). You wire them by clicking from one pin to another. The wiring is mirrored in a diagram.json file that can also be edited by hand.
3. Write the main.py
In the code editor, write your MicroPython program exactly as you would on a real board (the same machine and time modules). It is the same code that will run on the physical Pico.
4. Run the simulation and watch
Click ▶ (Play). Wokwi loads the simulated MicroPython firmware and runs the main.py. LEDs light up, displays display. A serial console (bottom panel) shows the print() output and gives access to the REPL, just as on hardware. The ■ (Stop) button halts it. You edit on the fly, then run it again.
Example — a simulated button and LED
Blink, but triggered by a button, so as to show a digital input alongside an output.
Wiring: LED on GP15 through a 220 Ω resistor to GND. Button between GP14 and GND, in PULL_UP (the internal pull-up is enough, no external resistor).
from machine import Pin

bouton = Pin(14, Pin.IN, Pin.PULL_UP)   # pull-up: 0 = pressed
led = Pin(15, Pin.OUT)

while True:
    if bouton.value() == 0:    # button pressed
        led.on()
    else:
        led.off()
Run the simulation and click the button: the LED lights up as long as it is held. If the wiring is wrong (button to 3.3 V instead of GND), the behaviour changes: the simulation reproduces the mistake faithfully without breaking anything.
Take a screenshot of the Wokwi simulation of the button and LED circuit, with the button being pressed and the LED lit.
Pitfalls
“It works in Wokwi” ≠ “it works for real”. Simulation idealises: no noise, no contact bounce, no realistic voltage drops, approximate timing. A software debounce can look pointless in simulation and turn out to be indispensable on the real button. Validating in simulation is a step, not the last one.
Missing components. Many off-the-shelf sensors are not in the Wokwi library. Check availability before building a simulated proof of concept around one.
Unfaithful timing. time.ticks_ms() and ticks_us(), and time-critical code in general, do not behave as they do on hardware. Do not calibrate a frequency measurement or a timed control loop there without checking on the real board.
Built-in LED: GP25 in simulation. On the simulated Pico (non-W), the built-in LED is GP25. The Pin("LED") shortcut of the Pico W boards may not be recognised. In simulation, write Pin(25, Pin.OUT).
Internet connection required. Wokwi is 100% online — with no network, there is no simulation.
Special case — Tinkercad and local simulation
- Tinkercad simulates the Arduino (Uno/Mega) well but not the Pico or MicroPython: for this module, Wokwi is the one to use.
- MicroPython Unix port — to test pure logic (with no simulated hardware), MicroPython also exists as a PC build: useful for validating an algorithm, not a circuit.
Where it fits in the project
- Step 1 of the proof of concept phase — Wokwi is used to prototype wiring and logic before the first lab session: you arrive with a
main.pythat already works, and gain time on the first power-up. - Step 2 of the proof of concept phase — when a module does not work on the bench, simulating the same wiring separates a logic problem from a hardware one.
- Demonstration and teaching material — a simulation can be projected and shared as a URL, and illustrates a piece of logic without touching hardware.
Half an hour of simulation before the first power-up markedly reduces the risk of destroying a component through a bad initial connection.
Going further
- wokwi.com — the tool itself, with Pico and MicroPython examples ready to fork.
- Getting started with MicroPython — the equivalent on real hardware.
See also
- MicroPython — the module hub
- Getting started with MicroPython — on real hardware
- Wokwi — the tool tutorial for this simulator (Arduino and ESP32 side)
- Circuit simulation — the hub: method, and how to read results
- Tinkercad — the Arduino equivalent (does not cover the Pico)
- Microcontroller — an overview of the MCU families